Photo credit: Pinterest
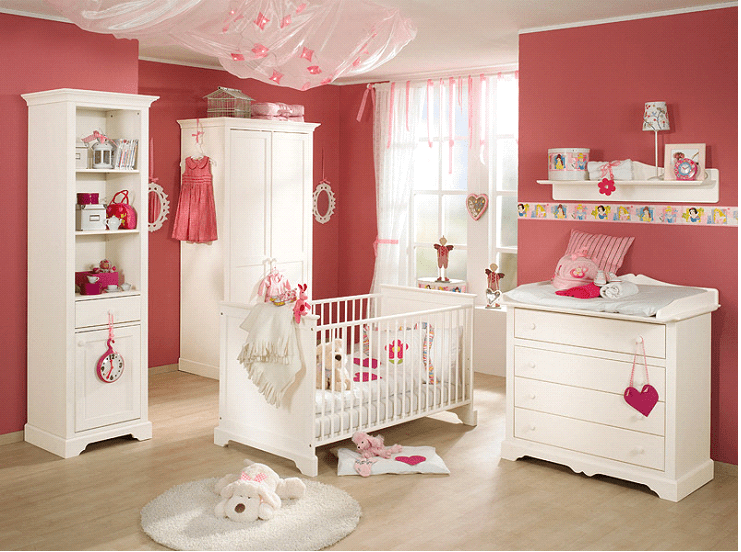
Photo credit: Wayfair
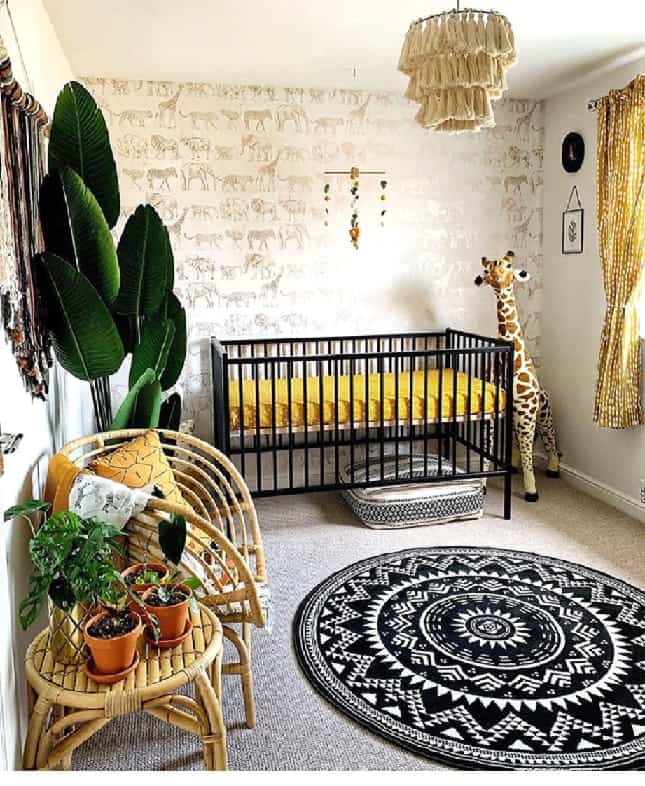
Where To Begin Setting Up Your Nursery Space
The key to organizing a well-appointed nursery is well-structured, efficient furniture pieces that also function as storage. All organizers should be adjustable and versatile to adapt to the continuous, ever-changing needs of growing children. Baby furniture is scaled small and quickly outgrown; eventually, you’ll need to replace it with larger pieces, which involves spending more money and reconfiguring everything in the room. It’s common to recoup just a tiny fraction of what you paid for baby furniture, meaning that it’s best to start a nursery with pieces that can at least convert to the juvenile stage in the long run. Practically speaking, well-made furniture purchased for a nursery that can last until the child goes to college is wise. Furniture features to look for are
1. Many midsized drawers to accommodate most inventories;
2. drawers that fully extend for ease of access and viewing;
3. adjustable furniture cabinet shelves, and
4. furniture pieces that extend above waist level to capture commonly unused lateral space for storage.
5. Managing Nursery Articles
Clutter chaos is expected in a nursery since babies need so many things. To establish order in a nursery, keep what you’ll use now; everything else—such as hand-me-downs, more oversized clothes, advanced toys, and books—should be containerized, labeled, and stored out of sight. The following detailed information can help you successfully organize each part of the nursery.
Step 1: Organize Baby Clothes
The best but most challenging time to organize your baby’s wardrobe is right after birth, which is when you know what fits now and perhaps in the next few months, which is all that gets stored in the closet and drawers.
Many people need to prepare the nursery before the baby arrives, and when clothing gifts and hand-me-downs are given beforehand, it makes sense to put them in order. You can always get an accurate estimate of your newborn’s birth weight from your obstetrician, which can help you organize the clothes before the baby arrives. Fine-tuning gets done later.
Always keep the tags on everything until you use a baby item. Try your best to organize all your receipts right from the start so you can best keep track of which one goes with what thing. Divide the receipts according to the stores where they were purchased and place them in a labeled folder or envelope. You can also attach the receipt to the tag on the clothing item.
When organizing baby clothes, gather the entire wardrobe and place it on a large, clean surface. Hand-me-downs should get washed well. Have bags ready for donation, returns, trash, and items to put away for future use. Sort everything by size. However, keep in mind that there is no size standardization in the clothing industry, so review size charts by clothing brands found on websites or tags. Then place clothes in their respective size groups.
Organize clothing by size first and then season. Consider that some clothing can receive use in multiple seasons. With this in mind, select the upcoming season for such clothing so you do not miss an opportunity to use the items. Go through your divided piles and remove all the used clothes with rips, missing buttons, stains, broken zippers, or things you don’t like. Check clothes over for safety. Loose buttons, snaps, bows, and appliqués are choking hazards.
It’s common to keep too much clothing in each size because it’s hard to judge how quickly a baby will grow. However, it’s essential to know that babies grow the most in the first year. Layette and newborn sizes typically receive the least amount of use, and newborns don’t go many places anyway. At this stage, sleepers are the keepers, so stock less regular clothing—under ten outfits to start. Included in this amount can be one special occasion outfit.
Additionally, a single coat, casual jacket, and two pairs of shoes are enough. A typical newborn runs through two to four sleepers and onesies in a day. Therefore, figure out the laundry schedule and stock accordingly.
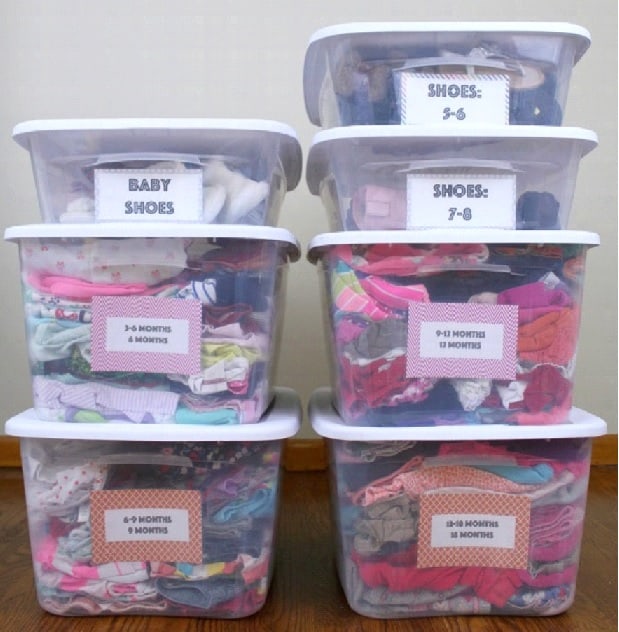
Keep only clothing that currently fits, plus the next size or two up, in the drawers and closet. Situate clothing by category and use organizers or separate compartments to divide the different sizes. Doing so will make it easy to remove the outgrown sizes and replace them with another size.
Generally, it’s best to return new clothes that will not fit until nine months in the future since it’s hard to judge a baby’s growth rate that far in advance. In labeled containers, keep unreturnable and hand-me-down clothing that will not fit the baby until he or she is eighteen months. These containers can be stored in overhead compartments in the closet, under the bed, or in a designated storage area.
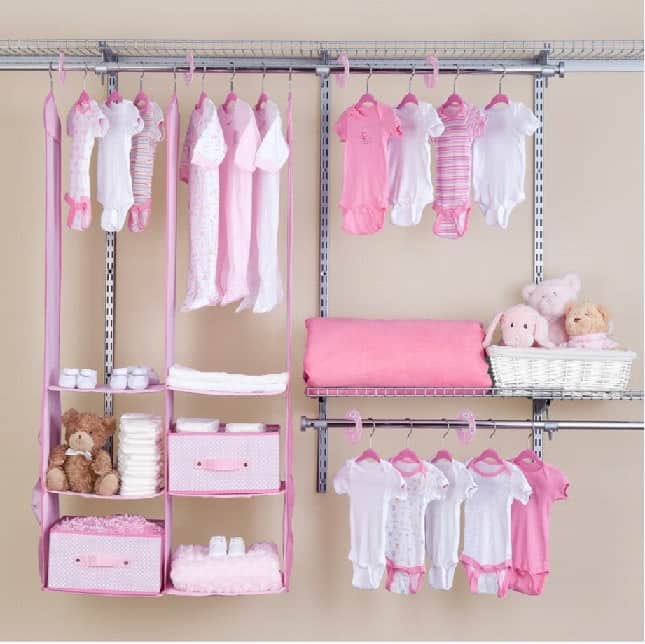
Hanging clothing is always the best storage option for many reasons. First, hanging clothes prevents wrinkling. It’s easier and faster to flip through hung clothes than hunting through a drawer, bin, basket, or any container. Unlike folded items, you can often judge when clothes are outgrown based on where the garment drops from a hanger compared to others. Starting in the laundry room, hanging clean clothes is more effortless than sorting, folding, and stacking them.
Another way to gain additional hanging storage is by investing in an armoire or wardrobe cabinet. Not only do armoires and wardrobe cabinets hide everything away neatly, but also they can hold many belongings. Besides hanging rods, armoires can also get outfitted with shelves, pullouts, and drawers.
Photo credit: Pinterest
Step 2: Organize Baby Linens
The primary baby linens to have are blankets, bibs, burp cloths, and crib sheets. It’s necessary to do a diligent job organizing each of these groups of linens since they’re needed, washed, and used daily. It’s essential to have the right amount of baby linens on hand, so you don’t run out; keep them situated in an easy-to-access location where used.
Blankets
The first thing to recognize is that RECEIVING BLANKETS serve more purposes than just swaddling the newborn in a baby’s first four months of life. They also make great burp cloths, diaper pads, towels, and privacy drapes for breastfeeding. These blankets are easy to recycle into cleaning rags, pet blankets, and toy baby doll blankets down the road. Receiving blankets are not all the same size. The smaller sizes make swaddling more complicated, and a baby quickly outgrows them. It’s best to keep the larger ones and return the small ones.
The great thing about receiving blankets is that they’re lightweight and easy to pack in a diaper bag, where you should always keep a few clean ones. You can roll the receiving blankets, along with some bibs and diapers, and store them upright in an open container or caddy near all the feeding and changing stations in the home. A dozen receiving blankets per baby is adequate, using two receiving blankets per day and allowing a week’s turnaround time for laundry.
Usually, a baby does not have the motor skills to push a blanket away until around age one, making them suffocation hazards when left in the sleeping area. Therefore, pack CRIB or LARGER BLANKETS away under the crib or in an overhead closet compartment. Bulky items like these, which need long-term storage, can be stowed in vacuum-compressed bags to reduce their storage conservation size dramatically. DECORATIVE CRIB COMFORTERS can also be displayed in the nursery, hung on the wall, or draped over a chair.
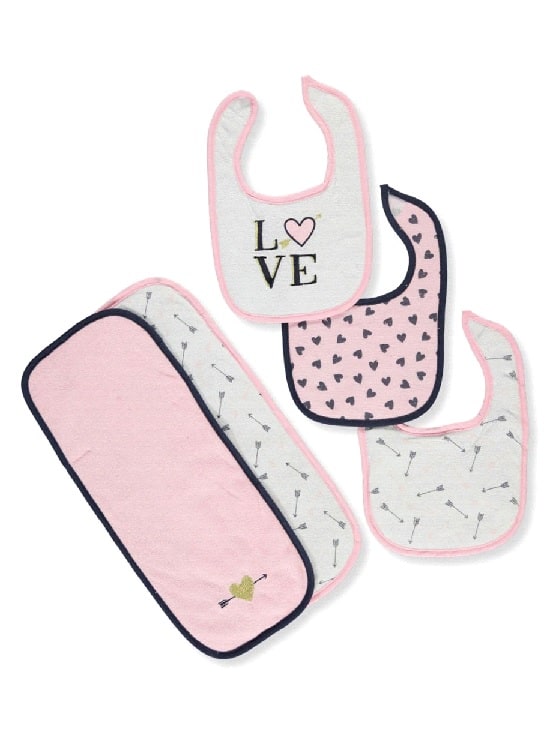
Photo credit: Amazon
Burp Cloths and Bibs
Before you tear off the store tags and begin to stockpile bibs and burp cloths, make sure you have the right kind and know how many you need. Consider returning or reducing newborn bibs, and use burp cloths as inexpensive substitutes—at least until when the baby is introduced to solid food. Also, consider only keeping bibs with Velcro enclosures since strings and snaps are inconvenient.
To establish the number of bibs and burp cloths you need, determine how often you replace them daily multiplied by the number of days between washings. Generally, six to eight should be sufficient, which are quickly outgrown.
Once your baby starts eating solid food, the bibs need to change, along with where they’re stored. This is the time when the baby graduates to the high chair, which typically resides in the kitchen. At this time, keep bibs near the baby’s food or high chair. A high chair hook or hanging pocketed organizer can store them. You can even stash them in a kitchen drawer, counter canister, or a basket located in the pantry.
Older babies and toddlers have bibs that typically come in two sizes: six to twenty-four months and two to four years. These bibs are generally plastic, so they wipe clean and don’t need to be laundered. Therefore, only stock a few.

Photo credit: Wayfair
Crib Sheets
Three to five crib sheets are enough for a nursery, given several changes per week. Babies usually outgrow their cribs between one and three years of age. Therefore, unless you have a crib that converts to a toddler bed, it’s unnecessary to invest in more sheets. Many people buy quilted sheet savers to catch drools, leaks, and the like so they don’t have to hassle changing the baby’s sheet in the middle of the night. However, sheet protectors are not as beneficial as they may seem since they’re yet another expense, require storage, and still need to get washed.
Store crib sheets in a separate labeled container inside the linen closet or the nursery if they’re changed frequently. Under the crib in a wheeled organizer or a changing table basket are good spots for them in the nursery.
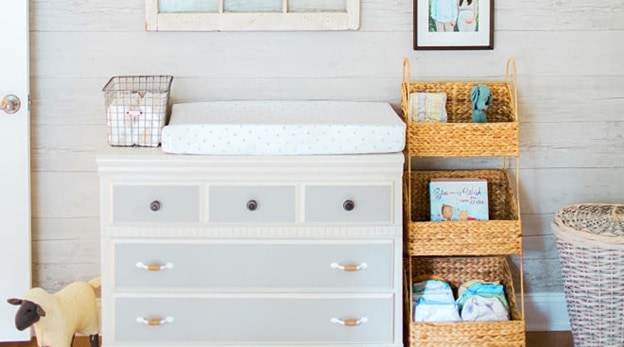
Step 3: Set Up a Changing Table
A designated, central place to change diapers, dress, and groom your baby is necessary. Otherwise, belongings needed to do these jobs tend to scatter everywhere, requiring more steps. Changing tables come in different configurations and dimensions. Make sure that yours is the right height for those caring for the baby.
Many people opt to place the changing pad right on top of a low dresser and use the upper drawers to stash diapers, lotions and wipes to save room and money. You can purchase a changing table topper for a dresser counter to secure the changing pad. Some even have easy-to-access compartments to store supplies.
A basic, budget-friendly changing table features a top-level for the changing pad and shelves below. On the shelves, use several open-top baskets or containers to separate items, such as diapers, lotions, and brushes. Place items used daily on the upper shelves, such as wipes and diapers. The lower shelves can hold other items like baby toys. Place items that move to other rooms, such as bathing essentials, in handled organizers like caddies. The lower shelves can also contain larger baskets for laundry and trash.
In small nurseries, use diamond-shaped changing tables designed for corner placement to economize space. Foldaway or wall-mounted changing tables also benefit tight spaces.
Changing Table Tips
• Key things to have at a changing station are easy-to-access pullout baskets, drawers, hamper, and trash
compartments.
• A good changing table is a safe one. Use overhead shelving sparingly, and don’t place daily needed baby-care
supplies on it since something will inevitably fall on the baby.
• Use safety straps on the changing pad.
• Make sure anything placed around the changing pad cannot break or spill, especially when the baby can grab.
Plan a smart space since you are dealing with a squirmy baby at this place. Take out diapers, wipes, cotton swabs, receiving blankets, and all toiletries from their original packaging and place them in open, easy-to-access containers—no hard-to-access screw tops, snaps, zippers, or button or clasp enclosures organizers. Avoid deep or big containers since they’re too hard to sort through and lift. No breakable or slippery organizers since you are often dealing with wet, greasy hands.
Limit your inventories, so your changing area is never crowded. Excess diapers, wipes, creams, ointments, and so on bought in volume can reside in closets, pantries, or under the crib.
Prepare the changing table in advance. While the baby is asleep, get ready for the next round of work the baby will bring. If they need medication, have it out, along with a bib, burp cloth, or whatever is necessary by the changing station, so when the baby awakes, things will run more smoothly.
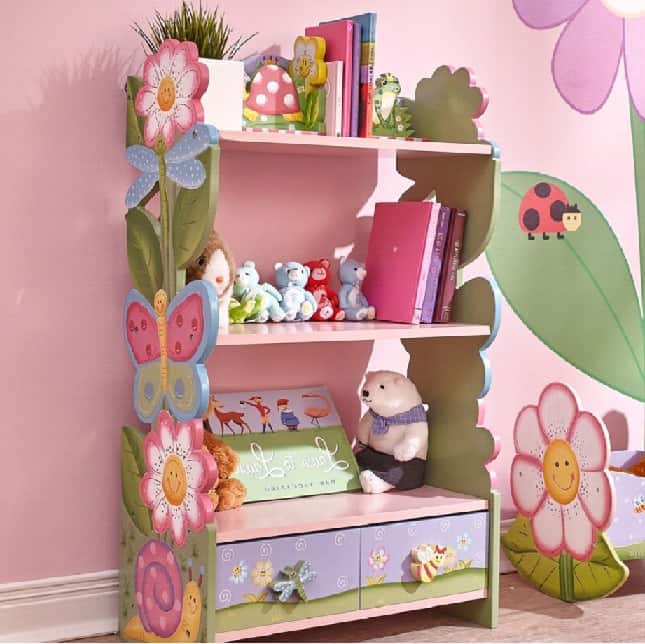
Photo credit: Blog
Step 4: Keep Toys and Books Under Control
In the nursery, keep only the toys and books used during the first year of life. Hand-me-down toys or books that are not yet age-appropriate need to get packed away in separate containers and divided according to age ranges such as one to three years. Before packing them, donate items you don’t like because they can turn into future clutter. Place storage containers on overhead closet shelves, under the crib, or in a place where they won’t be forgotten.
Storage Arrangements for Toys and Books
The key to storing toys and books is to make them easy to access for little people, so when they’re old enough to walk, they can help themselves and learn to clean up. Therefore, no high shelves, lidded containers, screw tops, and so on. Also, refrain from using large containers that quickly become too heavy to move and make belongings hard to find.
Choose safe storage essentials: rounded edges versus sharp square ones and no unfinished wood that can cause splinters. Storage units should have a stable construction—nothing wobbly. Anything that can tip over from too much weight is dangerous, such as tall shelving units; make sure everything tall gets fastened to the wall. Nothing placed overhead should be heavy. Never use tiered storage that is climbable. Toy chests should have two safety-lid supports and cutouts to prevent finger pinching. Chests with top lids, inside which a child can fit, become suffocation hazards.
Use correct organizers for the right size and weight of small toys in little containers and more giant toys in bigger containers. Tiered bin storage units are great for dividing small groups of things, such as balls and Matchbox cars. There are bin storage racks that come with slanted shelves for easy access and viewing.
Bulky electronic toys, such as activity centers, sight and sound toys, musical toys, and stacking toys, can store in deep shelves, bins, or cubbies. Keep lightweight items like stuffed animals, balls, plush toys, and rubber toys in chests, bins, buckets, and crates on the floor or shelf or in a cubby compartment.
Store books in cubby compartments, bookcases, or wheeled carts, but not on open shelving since small children cannot manage bookends well. Look for bookcases with wall-mounted designs and rails that hold books facing forward, so books are easy for children to find. Whenever you invest in a freestanding bookcase, make sure it’s not a tipping hazard and purchase a tip-restraint kit for securing it to the wall studs.
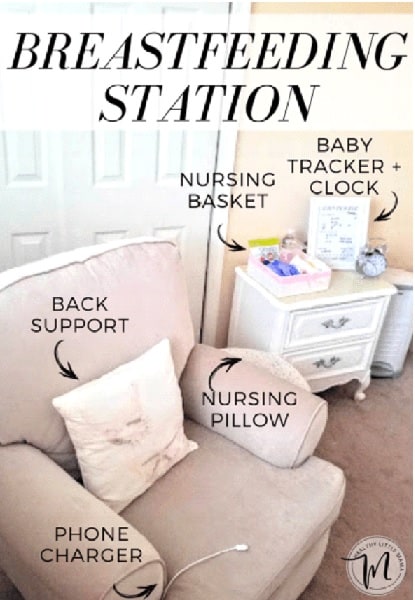
Photo credit: M BLog
Step 5: Create the Perfect Feeding Area
The primary place to nurse or bottle-feed your baby should be near the crib for a convenient nap and nighttime feedings. A rocker or comfortable chair plus an easy-to-reach table with many drawers, shelves, or cubbies, is the basic arrangement. Add overhead racks only when you need places for additional belongings because you don’t want to clutter the tabletop with too many things, and it’s essential to keep everything necessary nearby.
Other ways to keep your tabletop clutter-free are to use floor lamps or wall-mounted fixtures and wall clocks; place all electronics elsewhere, using remotes to control them from the feeding area. A pocketed chair organizer is a good solution for storing essential items close by and frees up table space. The tabletop should have only a bottle warmer, electric breast pump, feeding timer, unbreakable water glass, and a place to put a bottle.
Tables with drawers need compartments for separating belongings, such as pocket tissue, over-the-counter (OTC) medications, pacifiers, teething rings, burp cloths, nipple cream, breast milk labels, feeding logs, and writing instruments. Should this area be a breast milk pumping station where idle time needs some productivity, stash packaged snacks, manicure tools, books, magazines, crossword puzzles, and a place for electronics in the drawers to pass the time.
Tables with lower shelving, deep drawers, or cubby compartments can store items like humidifiers, nebulizers, baby bottles, pumping accessories, manual pumps, breast milk coolers, breast milk totes, paper towels, nursing pads and pillows, neck pillows, receiving blankets, and diaper bags.
Bottles, nipples, and all breast-pumping equipment supplies should be divided and separated in storage. Place each group of items in a separate compartment or container and keep them next to each other. If there is a secondary place in the home where you feed your baby, fill a handled storage caddy that can easily transport the basics like a bottle, pacifier, burp cloth, or whatever you need for a single feeding. Store this organizer at the main feeding area, where it can easily get replenished with supplies.
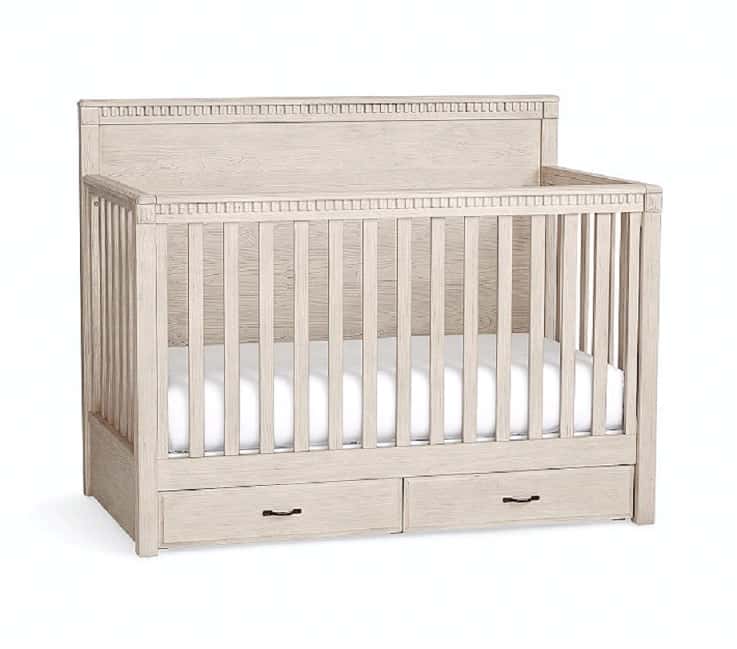
Photo credit: Pottery Barn Kids
Step 6: Prepare a Well-Organized and Safe Sleeping Area
Keep the crib interior free and clear to avoid any suffocation hazards. This also means anything hanging from the crib, such as an activity center or mobile. Consult your pediatrician for safety precautions. Anything placed next to the crib should be out of the baby’s reach. Make sure that there are no tripping hazards on the floor near the crib. Don’t place the crib near a window since it may not be long before the baby can climb. Also, windows are sunny, drafty, and breakable.
Trundles and under-the-crib storage essentials are suitable investments since they take advantage of dead space. A long crib skirt should be able to hide anything placed there. Some key items to stash under the crib are diaper essentials, toys, off-season clothes, bathing supplies, linens, and breast pump supplies. Keep your nursing or feeding area close to the crib. Second in importance will be the changing station. You want these placed nearest to the crib due to their use.